
In this article, you will learn how to create sidebar menus using HTML, CSS, and JavaScript programming code. I have designed many more sidebar menus before. Hope you like these sidebar menus like those designs.
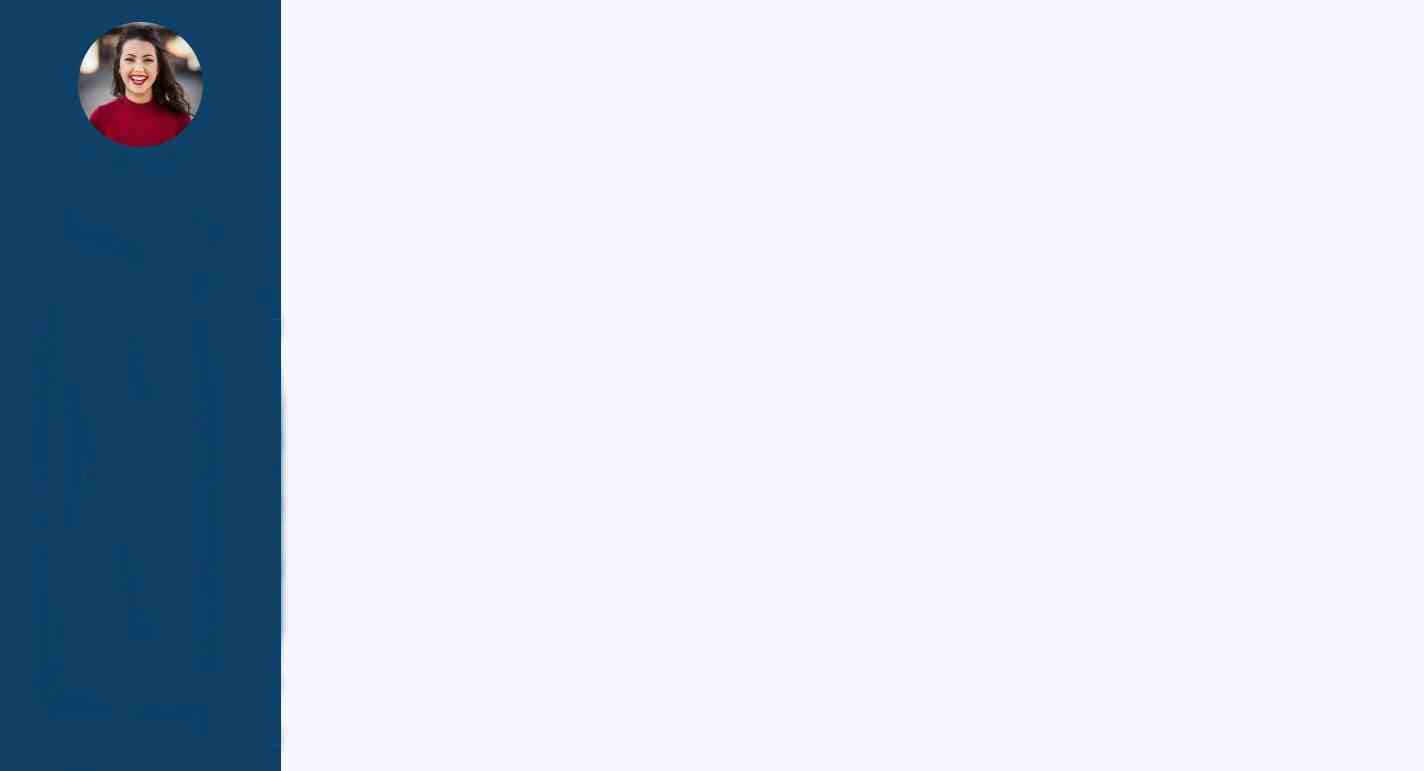
In this case, I have used HTML to build and CSS programming code to design. In this case, a small amount of JavaScript has been used to activate the menu button. If you want to create a sidebar menu without JavaScript programming code, you can see the other designs I made. Clicking on the menu button here will hide the entire menu bar.
When you click on that button again, the full menu bar will appear. This sidebar menu is designed in a modern way and has everything you need to make a sidebar beautiful and attractive.
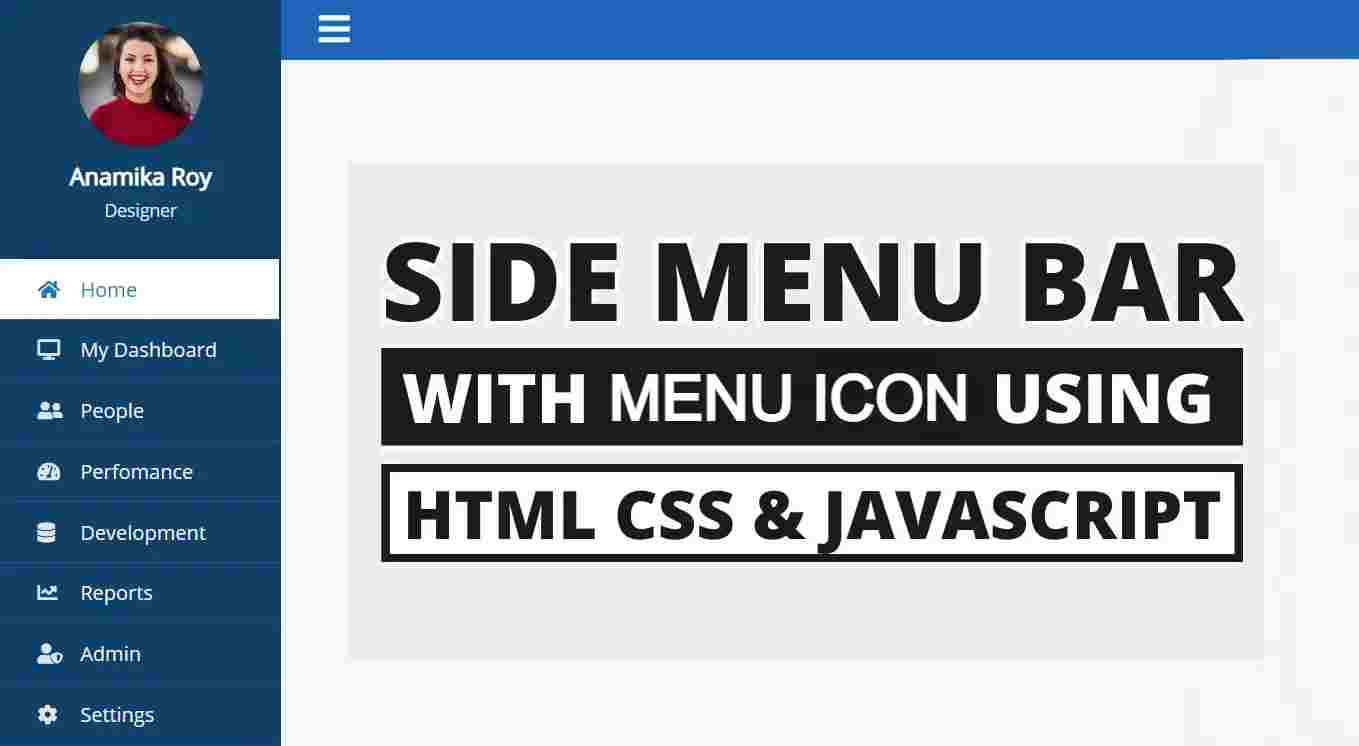
Sidebar Menu Using HTML CSS JavaScript
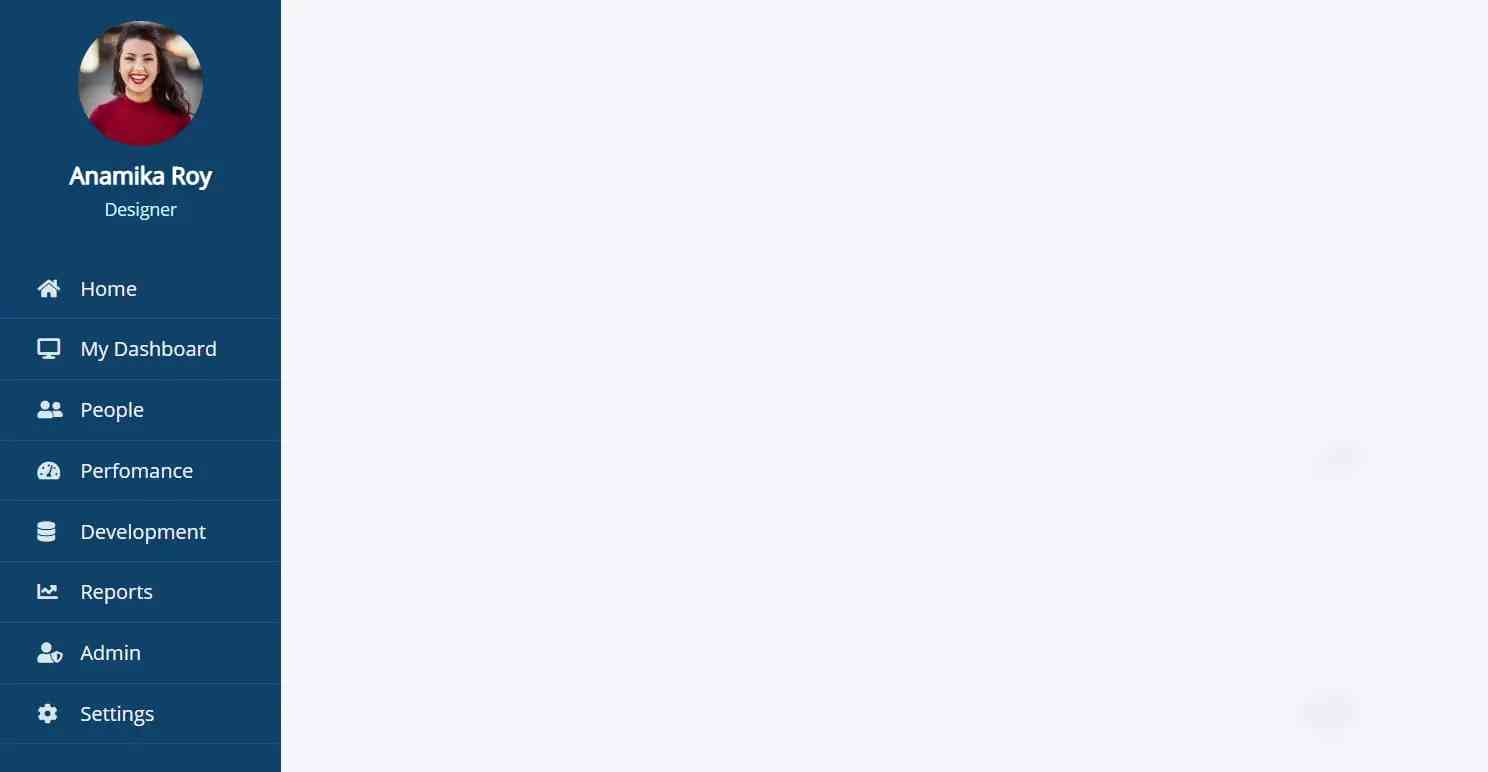
First of all, here I used a profile image. Below that is a place to give names and descriptions. Below that, I have added many menu items here. I added icons to each menu item. Adding icons makes menu items look more beautiful and attractive.
If you want, you can change these menu items to your liking. Here in the background, I have used blue color(background: rgb(5, 68, 104);) and added a hover color effect on menu items. The icons will change the background when you hover or click on the menu items. The sidebar menu is a very simple and simple design that you can undoubtedly learn to make very easily.
If you want to see a live demo of this structure, you can see the demo section below. You can also copy the required source code from there and use it for your own purposes.
See the Pen
side bar menu by shantanu jana (@fghty)
on CodePen.
Hope you like the demo above and you are interested in making this design. If you want the source code needed to create it, you can copy the source code from the demo section above. You can also download the source code from the download button below.
If you are a beginner then you must follow the tutorial below to know how to create this sidebar menu step by step. This requires you to have knowledge of basic HTML, CSS, and JavaScript programming.
Step 1: Create the basic structure for making sidebars
You create an HTML file then copy the structure below and add it to that HTML file. In the following structure, I have given the information exactly where you will add the following programming code.
<!DOCTYPE html>
<html lang=”en”>
<head>
<link rel=”stylesheet” href=”https://use.fontawesome.com/releases/v5.8.1/css/all.css”>
<meta charset=”UTF-8″>
<meta http-equiv=”X-UA-Compatible” content=”IE=edge”>
<meta name=”viewport” content=”width=device-width, initial-scale=1.0″>
<title>Document</title>
<style>
</style>
</head>
<body>
<div class=”wrapper”>
<!–Top Menu & Menu button–>
<div class=”sidebar”>
<div class=”profile”>
<!–Profile Image–>
<!–Profile Title & Descruption–>
</div>
<!–Menu item–>
</div>
</div>
<script>
</script>
</body>
</html>
The following programming code is CSS which was originally used to design and color the background of this sidebar menu. In this case, I have used blue color in the background. You can use other colors of your choice if you want.
@import url(‘https://fonts.googleapis.com/css2?family=Open+Sans&display=swap’);
*{
list-style: none;
text-decoration: none;
margin: 0;
padding: 0;
box-sizing: border-box;
font-family: ‘Open Sans’, sans-serif;
}
body{
background: #f5f6fa;
}
.wrapper .sidebar{
background: rgb(5, 68, 104);
position: fixed;
top: 0;
left: 0;
width: 225px;
height: 100%;
padding: 20px 0;
transition: all 0.5s ease;
}
.wrapper .sidebar .profile{
margin-bottom: 30px;
text-align: center;
}

Step 2: Add a profile image
First of all, I used a profile image here which helped with the following HTML code to add. The following CSS codes have helped to design and create that profile image.
<img src=”https://1.bp.blogspot.com/-vhmWFWO2r8U/YLjr2A57toI/AAAAAAAACO4/0GBonlEZPmAiQW4uvkCTm5LvlJVd_-l_wCNcBGAsYHQ/s16000/team-1-2.jpg” alt=”profile_picture”>
.wrapper .sidebar .profile img{
display: block;
width: 100px;
height: 100px;
border-radius: 50%;
margin: 0 auto;
}
Step 3: Add titles and descriptions
Below the image, I have added some text here. If you have seen the demo above, you will understand that I have used the name and professional below the profile image here. The following HTML and CSS programming codes have helped to create and design that.
<h3>Anamika Roy</h3>
<p>Designer</p>
.wrapper .sidebar .profile h3{
color: #ffffff;
margin: 10px 0 5px;
}
.wrapper .sidebar .profile p{
color: rgb(206, 240, 253);
font-size: 14px;
}

Step 4: Add menu items as needed with Html code
Notable among these sidebar menus is the menu item that I used to create the following HTML programming codes. In this case, I have used one icon before each menu item. The following HTML programming codes have helped to create that. Of course to activate these icons you will use the font awesome CDN link in the head section of your HTML file.
<ul>
<li>
<a href=”#” class=”active”>
<span class=”icon”><i class=”fas fa-home”></i></span>
<span class=”item”>Home</span>
</a>
</li>
<li>
<a href=”#”>
<span class=”icon”><i class=”fas fa-desktop”></i></span>
<span class=”item”>My Dashboard</span>
</a>
</li>
<li>
<a href=”#”>
<span class=”icon”><i class=”fas fa-user-friends”></i></span>
<span class=”item”>People</span>
</a>
</li>
<li>
<a href=”#”>
<span class=”icon”><i class=”fas fa-tachometer-alt”></i></span>
<span class=”item”>Perfomance</span>
</a>
</li>
<li>
<a href=”#”>
<span class=”icon”><i class=”fas fa-database”></i></span>
<span class=”item”>Development</span>
</a>
</li>
<li>
<a href=”#”>
<span class=”icon”><i class=”fas fa-chart-line”></i></span>
<span class=”item”>Reports</span>
</a>
</li>
<li>
<a href=”#”>
<span class=”icon”><i class=”fas fa-user-shield”></i></span>
<span class=”item”>Admin</span>
</a>
</li>
<li>
<a href=”#”>
<span class=”icon”><i class=”fas fa-cog”></i></span>
<span class=”item”>Settings</span>
</a>
</li>
</ul>
Step 5: Design menu items with CSS code
The following programming codes have helped to make the menu design above the basic design. This means that the following CSS codes have been used to indicate the size and color of the icons and text.
.wrapper .sidebar ul li a{
display: block;
padding: 13px 30px;
border-bottom: 1px solid #10558d;
color: rgb(241, 237, 237);
font-size: 16px;
position: relative;
}
.wrapper .sidebar ul li a .icon{
color: #dee4ec;
width: 30px;
display: inline-block;
}
Step 6: Add hover effect to menu link
A hover color effect has been used on the menu items in the sidebar, which means that the background color will change when you click on the items. The following CSS codes have been used to change this color. In this case, when you change the color of the background, the color of the text and icons will change.
.wrapper .sidebar ul li a:hover,
.wrapper .sidebar ul li a.active{
color: #0c7db1;
background:white;
border-right: 2px solid rgb(5, 68, 104);
}
.wrapper .sidebar ul li a:hover .icon,
.wrapper .sidebar ul li a.active .icon{
color: #0c7db1;
}
.wrapper .sidebar ul li a:hover:before,
.wrapper .sidebar ul li a.active:before{
display: block;
}

Step 7: Add navigation bar
In this case, I used a navigation bar but did not add any menu items in that bar. I used a button in this menu bar. Clicking on that button hides the sidebar and clicking again shows the sidebar. The following HTML programming code helped to build it.
<div class=”section”>
<div class=”top_navbar”>
<div class=”hamburger”>
<a href=”#”>
<i class=”fas fa-bars”></i>
</a>
</div>
</div>
</div>
Used to design the bar on the top made above and to design the menu icon.
.wrapper .section{
width: calc(100% – 225px);
margin-left: 225px;
transition: all 0.5s ease;
}
.wrapper .section .top_navbar{
background: rgb(7, 105, 185);
height: 50px;
display: flex;
align-items: center;
padding: 0 30px;
}
.wrapper .section .top_navbar .hamburger a{
font-size: 28px;
color: #f4fbff;
}
.wrapper .section .top_navbar .hamburger a:hover{
color: #a2ecff;
}

This code indicates what will change in the sidebar when you click on that menu button. If you look below, you will see that when the menu button is activated, the sidebar will move 225 pixels to the left, which means that the sidebar will be completely hidden.
body.active .wrapper .sidebar{
left: -225px;
}
body.active .wrapper .section{
margin-left: 0;
width: 100%;
}
Step 8: Activate menu buttons using JavaScript code
Above I have shown what will change when you click on that menu button. Now you have to make that menu button effective. That is, when you click on that button, the instruction given in the above CSS code will work. For this, I have used a small amount of JavaScript which is below.
var hamburger = document.querySelector(“.hamburger”);
hamburger.addEventListener(“click”, function(){
document.querySelector(“body”).classList.toggle(“active”);
})

Hope you learned from this tutorial how sidebar menus are created using HTML, CSS, and JavaScript programming code. In the meantime, I have designed the side menu bar using only HTML and CSS code without JavaScript.
If you want to know the design of other menu bars like the top menu bar, full-page menu bar, etc. but you can use these links.