Here you will learn how to create a 3D Image Slider using Html CSS and javascript. 3d Image slideshow is a simple web element that can make the image look beautiful.
This not only enhances the beauty of the website but also enhances user satisfaction. Earlier I shared with you how to create many more types of image sliders, automatic image slideshow, etc.
This is the first time I am going to show you how to create a 3D image slider using HTML, CSS, and JavaScript code. I did not use any JQuery or JavaScript library. I created this project using Pure JavaScript and css3. As a result, even if you are a beginner, you can understand this project.
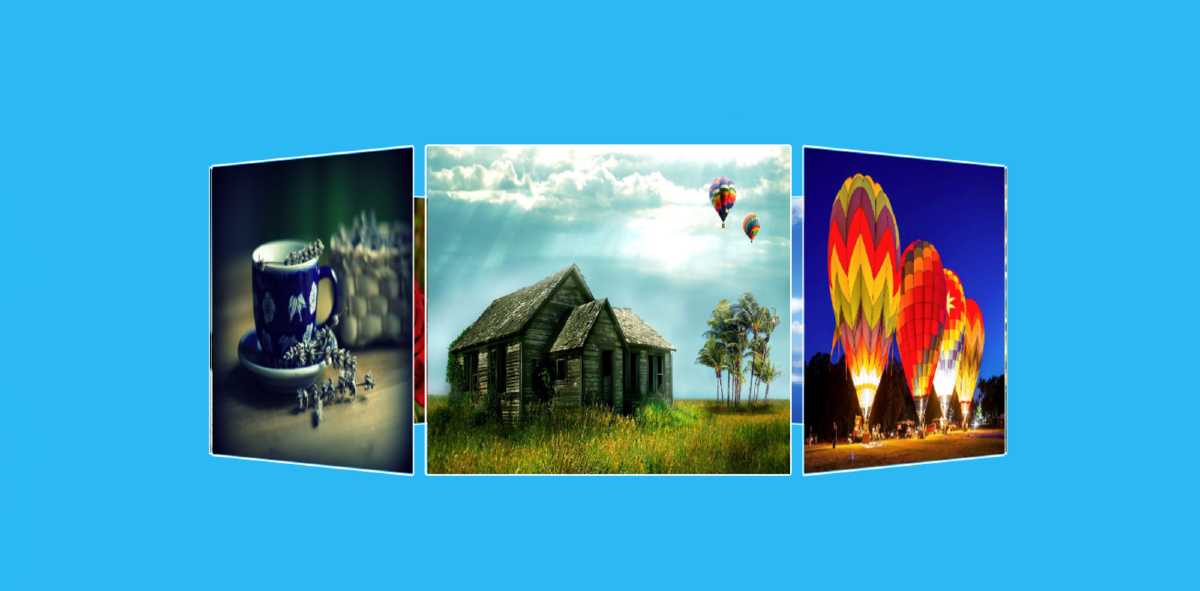
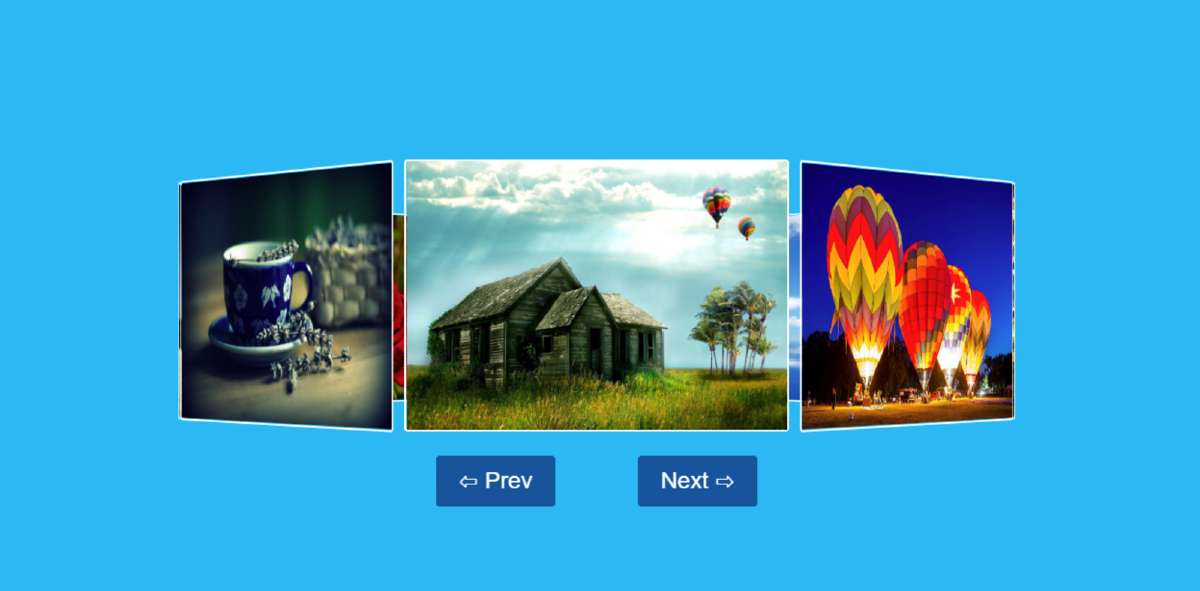
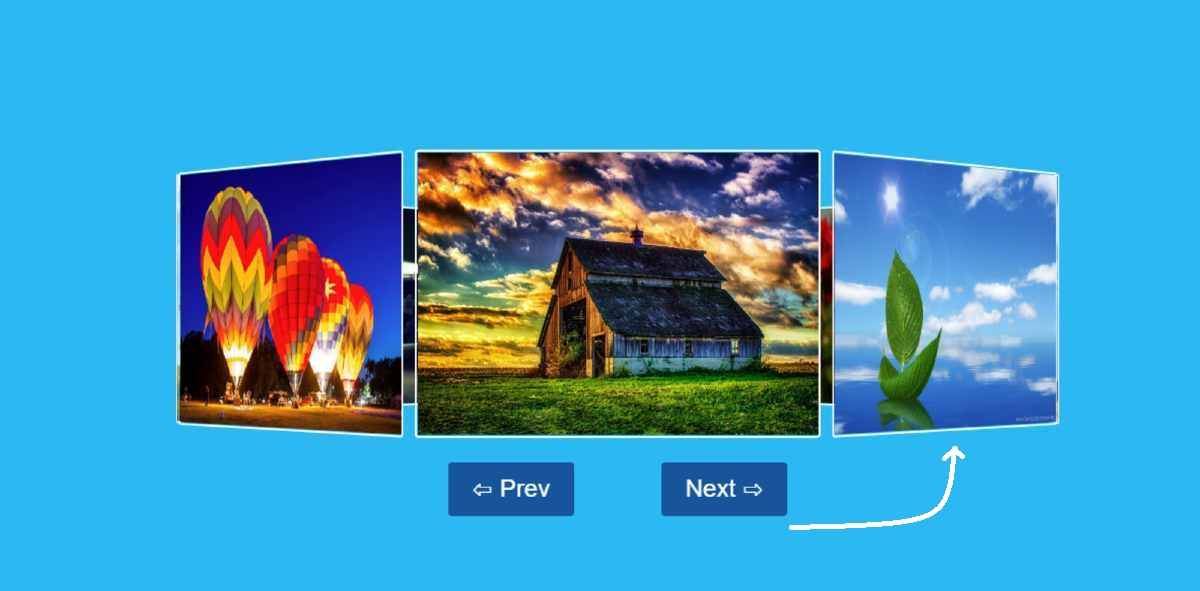
As you can see in the picture above many of the images here are arranged in the shape of a circle. Also here are the Next and Previs buttons. The images can be changed by clicking on those two buttons. I used 8 images and arranged each image at a 45-degree angle using transform: rotateY ().
3D Image Slider Using HTML CSS
I have given the background # 07bdf4 color of everyone’s first web page. Then here I have used 8 images. I arranged the images with each other at a 45-degree angle.
I also created a border around the images using border: 2px solid white to enhance its beauty.
Below is a live demo that will help you better understand how it works. Here you will find the required source code which you can copy and use in your project. I have also given the download link at the bottom of the article which you can use to download the source code of the css3 image slider.
See the Pen
3d image slider using javascript by Foolish Developer (@fghty)
on CodePen.
Hope you like the design above. Now I have shown step by step how I made it. Here, after each step, I have given possible results so that you can understand.
Create a 3D Image Slideshow using HTML, CSS & JS
First of all, I created an HTML and CSS file. In this case, I did not create a separate JavaScript file. However, if you want, you can create a separate js file (index .js).
Step 1: Create its basic structure
The following HTML and CSS codes are their basic structure. I used background-color: # 07bdf4 here and the minimum height is 100vh. Here the height of the image slider is 20rem and the width is 20rem.
Step 2: Add the required images
Now I have added the necessary images here. Here I have added a total of eight-piece images. I used a 2-pixel border around those images. Its height and width I have used 100% mean its height and width will remain the same with the slider.

Step 3: Arrange the images at specific angles
Now I will make a circle by arranging each image at a 45-degree angle using transform: rotateY. For this, I have arranged nth-child () at 45 degrees each.
The first image is at zero degrees. The second image is at a 45 ° angle. The third image is at a 90-degree angle. In the same way, I have arranged the art image in this way.
If you want to use more than 8 images, divide the number of images by 360. Use that quotient as an angle. If you use 10 images, arrange each image at a 360/10 = 36-degree angle.
Step 4: Create next and prev buttons
Now I have added two buttons to change the image. One is previous, the other is next. The buttons are background-color: # 00599c and the text color is white. margin: 0 2rem used to keep the two slightly away from each other. Font-size 1.2 em has also been used to resize texts.
Step 5: Activate the two buttons using JavaScript
So far we have only done the design work, now we have to implement these two buttons with the help of JavaScript code.
Here the next button will help to show the next image and the previous button will help to show the previous image. First of all, I set the constants of the two buttons and the slider one by one.
First I executed the Next button. Here the first angle is determined i.e. how many angles will be different when the next button is clicked.
Since I have placed each image at a 45-degree angle, clicking on the Next button will make a difference of 45. Then I implemented it using transform.
In the same way, I have implemented the Previs button. Here, first I have determined the angle and implemented each of them.
It’s a very simple and simple design. Basically, I used very little JavaScript to make the buttons work. If you want to know how to make a 3D image slider step by step, you can watch the video tutorial above. Below is the download link that you can use to download the code needed to create this project.