
If you want to make Javascript Limit Characters in the input box then this article will help you. Here I have shown how to create Limit Characters in textbox with the help of HTML CSS and JavaScript.
We see this type of character limit in the registration forms of websites. Where the user is told how many characters can be input there. Each character will count when you input the character. Warn the user when your input text exceeds the maximum input character.
Earlier I showed you how to build a random password generator using JavaScript. Now it’s time to create a JavaScript limit character text field.
Below I have given a live demo that will help you to know how this design works.
See the Pen
Limit Characters In Input Field Javascript by Foolish Developer (@fghty)
on CodePen.
Hopefully, the above demo has helped you to know how Javascript Limit Characters in the Input box works.
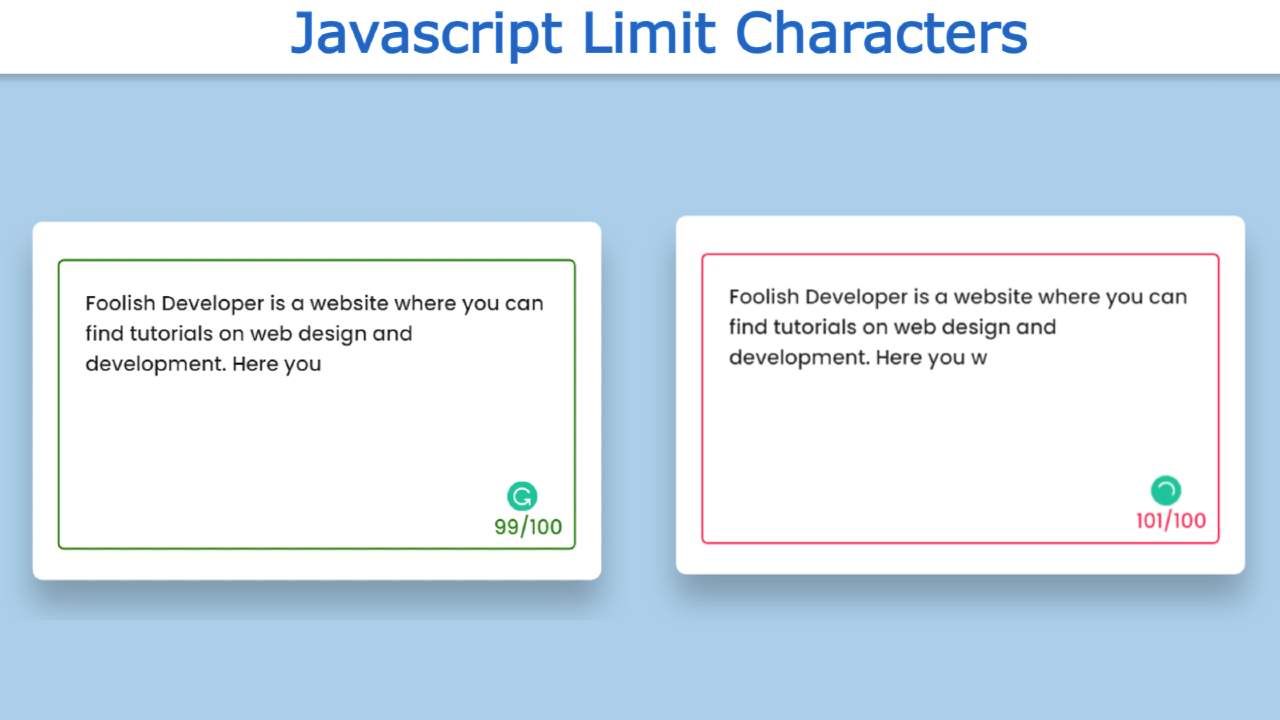
I made a small box on a web page as you saw in the demo above. This box contains an input place where you can input characters. Here I have used the maximum limit of 100. You can increase your choice if you want.
A border has been used around the input area. Normally this border is green and the counter numbers are also green. When you input a character in it, the number will continue to increase. When the size of the character exceeds 100, the green border will be red.
How to limit the number of characters in a textarea javascript
Below I have shown step by step how this Limit Characters input field has been created using HTML and CSS. Here I first designed it using HTML and CSS then implemented it with JavaScript.
Step 1: Design the Web page
I designed the webpage using the CSS code below. Here I have used blue as the background color of the webpage.

Step 2: Create a box with HTML and CSS
Now I have created a box on the webpage. As you can see above, there is a rectangular box. I have used this box with a minimum height of 250 px and a width of 450 px. I used white as the background color and border-radius to make the four of the boxes around.

Step 3: Create input space using Textarea
I created the text input place using the HTML and CSS code below. Basically, I used the textarea of HTML to create the input place. As you can see in the demo, there is usually a green border around the input box. I used border: 2px solid # 3ba51f to make it.

Step 4: Create Characters Count Place
Now I have created a count area using the following codes. Whenever you input a character, those characters will continue to be counted. Under normal circumstances, it cannot be seen. This can be seen after using JavaScript.

Step 5: Make the system activate with JavaScript
Above we just designed it now we will implement it with the help of JavaScript. First I set a constant of my-text and result. We know that no ID function can be used directly in JavaScript.
Using the var limit, I set the limit, that is, the number of characters you can input. Here I have used 100. If you want to input 200 characters in that input box then you can use 200 instead of 100.
I have used the following code to see how the counted characters in the input box look. As you have seen before, we have created a count area using HTML and CSS. Now I have implemented it using result.textContent.

Now below I have given the full condition. What if there are 100 characters in your input area and what if there are more than 100. For this, I have used the if function. First I saved the total number of characters to be input in the input box in a constant called textLength.
If the value of textLength exceeds the limit, the border and color will be red.
Then I put else and gave another condition. If the above condition does not apply then the text area and the result will be green which means there will be no change.


Hopefully, you have learned from the above tutorial how I created this JavaScript Limit Character Input Box. I have already created this type of limit character textbox using Jquery.
If you want to use jquery instead of JavaScript, you can see my previous article. If there is any problem, you can ask me by commenting. Below I have given the download button to download the source code.