
In this article, you will learn how to create Todo List using JavaScript. Todo List JavaScript is a wonderful project that will help beginners to increase their knowledge about JavaScript.
This type of JavaScript Todo List is mainly used to organize any of your information. Here you can create a list of many texts that you want to do later. Once you’ve done that, you can delete them. It can basically serve as a daily routine.
Todo List JavaScript
I have shown here complete information and tutorial on how to create a Todo List HTML using JavaScript. I took the help of HTML and CSS to design it. Implemented with the help of JavaScript.
Scientific Calculator in Java (Step by Step)
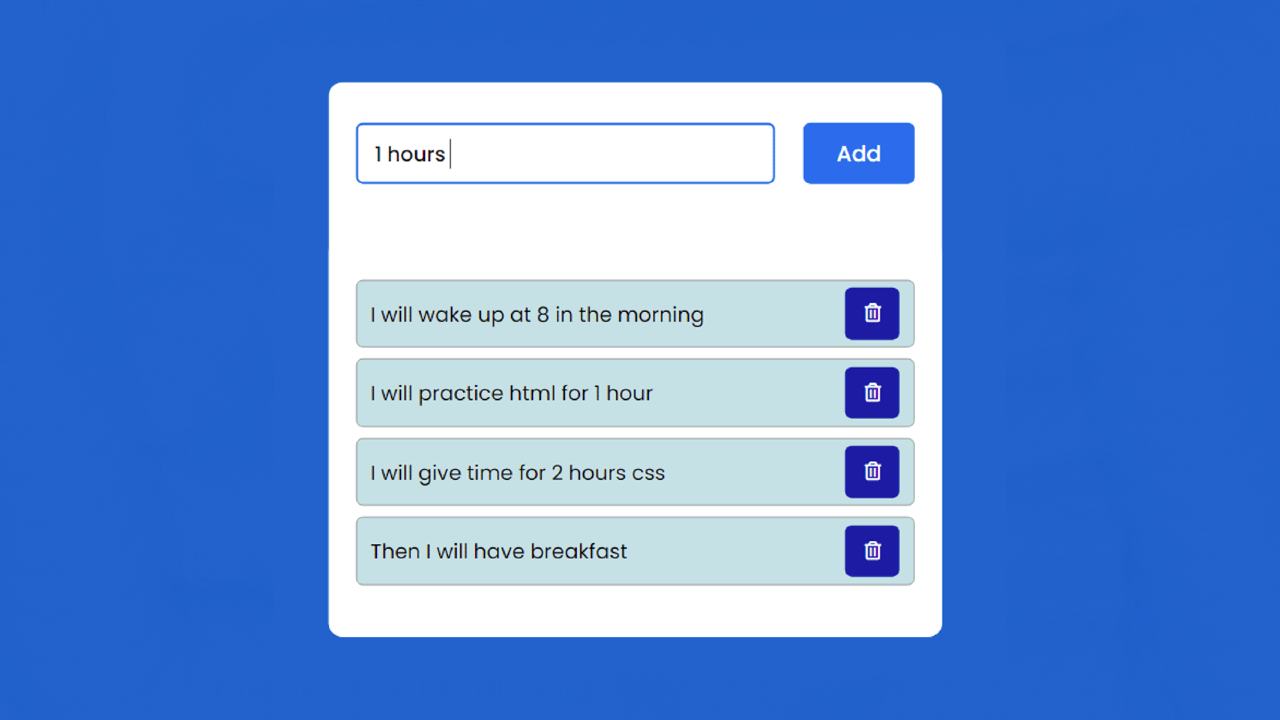
First I created an input space here. Here you can input any text. Then there is an ‘Add’ button which can be found in a list after clicking on it.
See the Pen
Untitled by Code Media (@codemediaweb)
on CodePen.
Next to each task or routine, there is a delete button which if clicked on the text will be deleted. Undoubtedly todo list HTML CSS is a great project.
How to Make a Todo List JavaScript
Below I have shared the complete tutorial on how I created this todo list HTML. That’s why you must have a basic idea about JavaScript. First I designed a web page then I made a box. Then I created a place to input using the input of HTML.
Now you create an HTML and CSS file. Then follow the complete information and tutorials below step by step.
Step 1: Basic structure of the project
I created a box on the webpage using the HTML and CSS code below. This is basically the basic structure of todo list.
Using the CSS below, I first added blue color to the background color of the webpage. I have used a min-width of 450 px and a min-height of 100px for this box.

Step 2: Create a place to input using HTML
I have created a space for input using the following HTML. With this, I have created a button that will help to input. The width of the input space is 75% and the height is 45 px.
I designed the button using the following CSS. Button width 20% and height 45 px are used. Here background color I have used blue and text color white.

Step 3: Make a list for viewing Todo text
I have also created a todo list view using the HTML and CSS codes below. All the information in this list can be found step by step. Since there is no set amount of information in this list, height is not specified here.
Now I have designed the cancel button in that list.
You may be thinking that I did not use any tag for the button here i.e. I did not use HTML. Then how can the button be seen?In fact, I added all the information of the button with the help of JavaScript. Now I am just designing it and later I will implement it with the help of JavaScript.

Step 4: Activate Todo List using JavaScript
Above we have designed this Todo List using HTML and CSS. Now the most important thing is to make it work with the help of JavaScript. To understand the structure of this JavaScript you must have a basic idea about JavaScript.
Below I have given the complete code together then I have explained step by step. If you do not understand the following codes, you may notice the explanations below.
JavaScript Explanation
First I have given the ‘if’ condition. If nothing is input in this input place, that is, if the input is 0, then a kind of alert will be seen here. This error message will ask you to input something.
➤ Now I have added the below conditions using else, which means what will happen if you add some information.
➤ First I used innerHTML which will help to see this information on the web page.
➤ Then I said to show the input text in the id called ‘taskname‘. I have already added the required CSS code for the ‘taskname‘.
➤ Then I created a delete button that will help to delete the information in the list. For this, I have added an icon here. I have already added the required CSS code for this button.
Now I have made arrangements to make the delete button effective. If you watch the demo you will understand that I have added a delete button in each list.
That button will help to delete that information. Here are the instructions to remove the information using a simple ‘onclick’.
Hope you understand the JavaScript structure above.

Simple Todo List in JavaScript [code]
There are many beginners who can’t put all these codes together. For them, I have put all the codes together and put them down. Copy the code below and then add it to your Html file.
See the Pen
Untitled by Code Media (@codemediaweb)
on CodePen.
If you have difficulty copying the above codes, download the source code below to create this project (Todo List using JavaScript).
If you click on that download button then the source code of the Todo List will be downloaded. If this is difficult to understand then you can watch the video tutorial above. Hopefully from this tutorial, you have learned how to create Todo List using JavaScript.